To ensure you make the most of your solar system, we’re here to guide you through the simple process of setting up WiFi connectivity. By connecting your inverter to your home network, you’ll gain convenient access to real-time monitoring and control capabilities directly from your phone to your solar inverter.
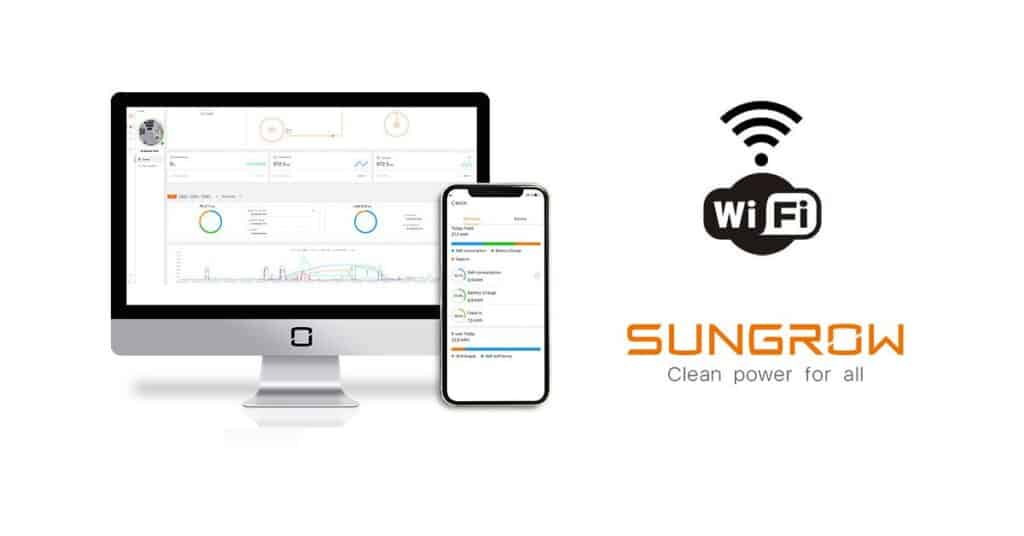
In this blog post, we’ll take you step by step through the process of setting up WiFi on your Sungrow residential inverter using the solar monitoring app called iSolarCloud.
By following the step-by-step guide outlined in this blog, you can easily set up WiFi on your Sungrow residential inverter. This seamless connectivity unlocks a world of possibilities, allowing you to take full advantage of your solar investment and embrace a greener, more sustainable energy future.
So, let’s dive in and unlock the full potential of your inverter!
What is solar Wi-Fi monitoring?
Solar Wi-Fi monitoring is a way for your solar inverter to communicate directly to you via a phone app. By using a wireless connection, your inverter will send you real-time data of your solar system. As well as provide additional and control capabilities.
What does solar monitoring do?
Once your inverter is connected to the app using Wi-Fi, it will provide valuable insights into your solar system’s production, system efficiency, and other essential parameters. This information empowers you to optimize your energy usage, identify any issues promptly, and make data-driven decisions to maximize your energy savings.
Granting Sunrays Power Access to Your Solar
As part of our post-sale and installation service delivery, Sunrays Power will monitor your solar system. By granting Sunrays Power access through the distributor/installer organization code during the Wi-Fi set up process, you enable remote monitoring of your system.
This allows Sunrays Power to provide remote support and perform diagnostics on your solar system. In case any technical issues occur, Sunrays Power can quickly troubleshoot and assist you in resolving the problem, minimizing system downtime.
If your want to learn more about how Sunrays Power remotely monitors your system, you can learn more about that here.


Setting up Wi-Fi Monitoring on your Sungrow Inverter Using the iSolarCloud App
Before initiating the WiFi setup on your Sungrow residential inverter, ensure the following:
- Enable 2.4GHz WiFi on your router: Sungrow inverters only support the 2.4GHz frequency band. Ensure that this frequency is enabled on your router.
- Set up WPA/WPA2 security: Configure WPA/WPA2 security on your router for enhanced network protection. This can typically be done through your router’s settings. If you require assistance, contact your internet service provider for guidance.
- Proximity to the inverter: Since the Sungrow inverter’s WiFi range is limited, ensure that your smartphone or device is near the inverter during the setup process. If your router is far away, consider purchasing a WiFi repeater to extend the signal range.
Step-by-Step Guide:
- Download the iSolarCloud App: Visit the App Store or Google Play Store on your smartphone and search for the “iSolarCloud” app. Download and install it on your device.
- Register your email: Open the iSolarCloud app and register using your email address. Select the “End User” option during the registration process. Enter your email address, and you will receive a verification code. Enter the code to verify your email and set a password for your account.
- Create and name a new plant: Once you have successfully registered, you can create a new plant within the app. Tap the plus (+) button located at the top right corner of the screen. Provide a name for your plant, select “Residential PV” as the plant type, enter the installed PV power in kilowatts (6.6kW or 13.3kW).
- Set the Location and Time: You can now set the inverter to the local time zone. Ensure that the address provided is accurate for better monitoring.
- Selecting consumption type: Select “Self-Consumption” as the grid connection type and enter the date of the system’s installation.
- Enter the feed-in tariff: For the feed-in tariff, you can select 0.05.
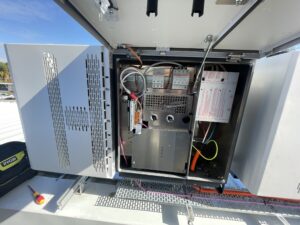
- Scan the QR Code: After completing the plant creation, you will be prompted to scan the QR code located on the dongle which is underneath the inverter. Use your phone’s camera within the app to scan the QR code, establishing a connection between your phone and the inverter’s WiFi.
- Connect to your WiFi network: Next, select the network option within the app and choose your local 2.4GHz WiFi network. Enter the network password when prompted. Note that the Sungrow app will only display available 2.4GHz WiFi networks. Follow the instructions to press the button on the dongle to initiate the connection, and then tap “Connect” on your phone. This will establish a connection between your inverter and your local WiFi network.
- Distributor/Installer Organization Code: In the app, tap the three dots located at the top right corner and select “Plant.” Under the “Distributor/Installer Organization Code” option, enter the code “AUS9YIFE” (This is our unique Sunrays Power code). This will allow for remote monitoring of your system by Sunrays Power. Please only place in this code if you are a Sunrays Power Client.
- Overview and monitoring: Return to the home page and navigate to the “Overview” section of the app. Here, you will find various parameters, including solar production and other system-related information. This concludes the Sungrow WiFi connection setup.
Now that you have connected your Solar System to your home Wi-Fi, what can you do on the app?
- Monitor your Energy: Using the monitoring app, you can access insights into parameters such as the performance ratio, which indicates how effectively your system is converting sunlight into usable electricity.
By keeping an eye on system efficiency, you can identify any issues or inefficiencies that may arise and take appropriate actions to maintain optimal performance.
- View Historical Production Data: The app also stores historical data, allowing you to analyse the long-term performance of your solar system. You can view trends, patterns, and comparisons over time, helping you understand how your system performs under different weather conditions and seasons.
Reviewing production trends throughout the year allows you to identify any anomalies or deviations from expected performance. It helps in diagnosing production issues such as sudden drops or inconsistencies in energy generation, which could be caused by system malfunctions, shading, or other factors.
This long-term analysis helps you make informed decisions about maintenance, system optimization, and potential upgrades to ensure your solar system operates at its full potential. This historical data is valuable for evaluating the overall effectiveness of your solar investment.
- Fault Detection and Diagnosis: To ensure prompt action, the app sends you alerts and notifications regarding your solar system’s performance. If any issues arise, such as a drop in solar production or a system error, you’ll receive instant notifications on your smartphone. These alerts enable you to address problems promptly, ensuring your system operates smoothly.
Upon detecting a fault, iSolarCloud provides detailed information about the specific issue, including the date, time, and nature of the fault. This information enables you to pinpoint the exact source of the problem and take appropriate measures to rectify it.
- Carbon Monitoring: Furthermore, iSolarCloud goes beyond monitoring your solar energy generation and extends to quantifying the environmental benefits of your system. Using your energy production data, the iSolarCloud platform calculates the approximate amount of CO2 emissions avoided based on your solar, and provides an estimate of how much CO2 emissions you have reduced by utilizing solar energy instead of relying solely on grid electricity.
By generating your own clean and renewable energy, you contribute to reducing greenhouse gas emissions that are associated with traditional energy sources.
Our Hot Tips:
If you want to assess the overall performance of your solar system, it is recommended to wait for at least a week to accumulate sufficient daily production data. This initial period allows for the collection of a significant amount of data points, enabling a more accurate analysis of your system’s performance.
By observing the daily production data over the course of a week, you can start to identify patterns and trends in your solar energy generation. This data helps you understand the typical daily variations in production and provides a baseline for comparison in the future. It also allows you to evaluate the system’s stability and consistency in converting sunlight into usable energy.
However, assessing the performance of your solar system based solely on a week’s worth of data may not provide a complete picture. Solar energy generation is influenced by various factors, including weather conditions, seasonal variations, and changes in sunlight intensity. To gain a deeper understanding of your system’s performance, it is beneficial to review production trends throughout the year.
Over the course of a year, you will notice distinct patterns in your solar production. Typically, solar output tends to be highest during the longer summer days when there is ample sunlight. As the seasons change, solar production gradually decreases during the winter season due to shorter days and reduced sunlight. By analysing the data across different seasons, you can identify the impact of these seasonal variations on your solar energy generation.
If you want to learn more about how to interpret the data shown on the iSolarCloud app, you can learn more about that here.